Interface
Learn RDM’s interface
Getting started with Remote Desktop Manager
RDM interface overview
Interface
Highly customizable and easy to use, Remote Desktop Manager (RDM) works the way you want it to. But, as with any tool, learning the user interface helps you work faster.
Understanding how RDM organizes your data
New data source
Store and secure your entries within the default local data source. In the RDM Team Edition, use an advanced data source to share entries with your team (File -> Data Sources).

Vault search window
Team data sources like Devolutions Server use vaults to segment your entries into logical containers. Apply additional permissions to vaults to ensure that the correct person connects with the proper entry.
New entry window
New entry window
Store passwords, credentials, connections, and more as entries within a vault or data source.
Quickly open an RDP connection
New Entry button
1. Add new entry
Click the New Entry button on the Edit ribbon menu, and under Session, select RDP (Microsoft Remote Desktop). Search to find any type quickly!
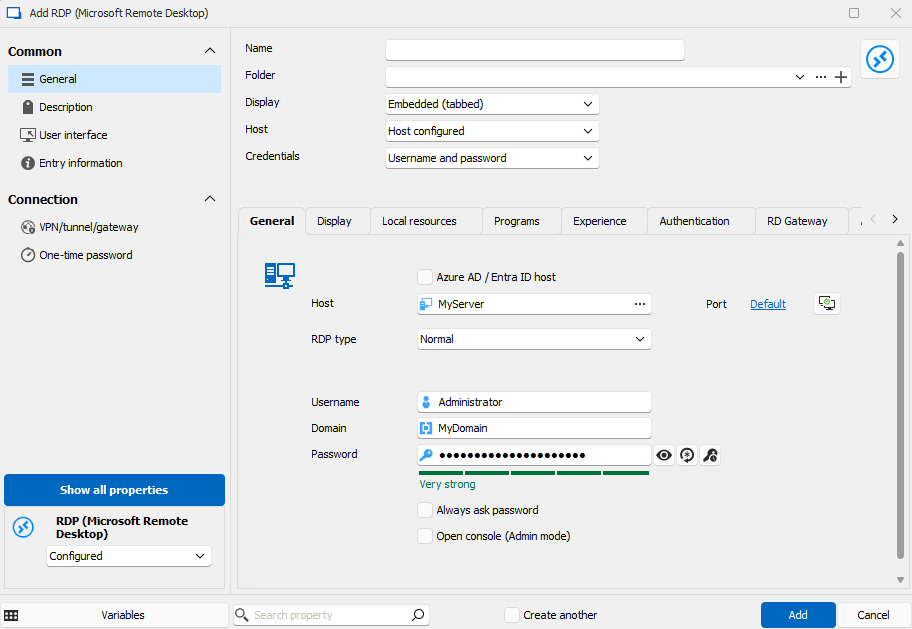
Input of RDP entry details
2. Enter connection details
Enter the Host to connect to, the login credentials, and click the Add button.
RDM authenticates as the startup user unless otherwise specified.
Pro tip! Link existing credential entries to connections to save time and update from a single location.
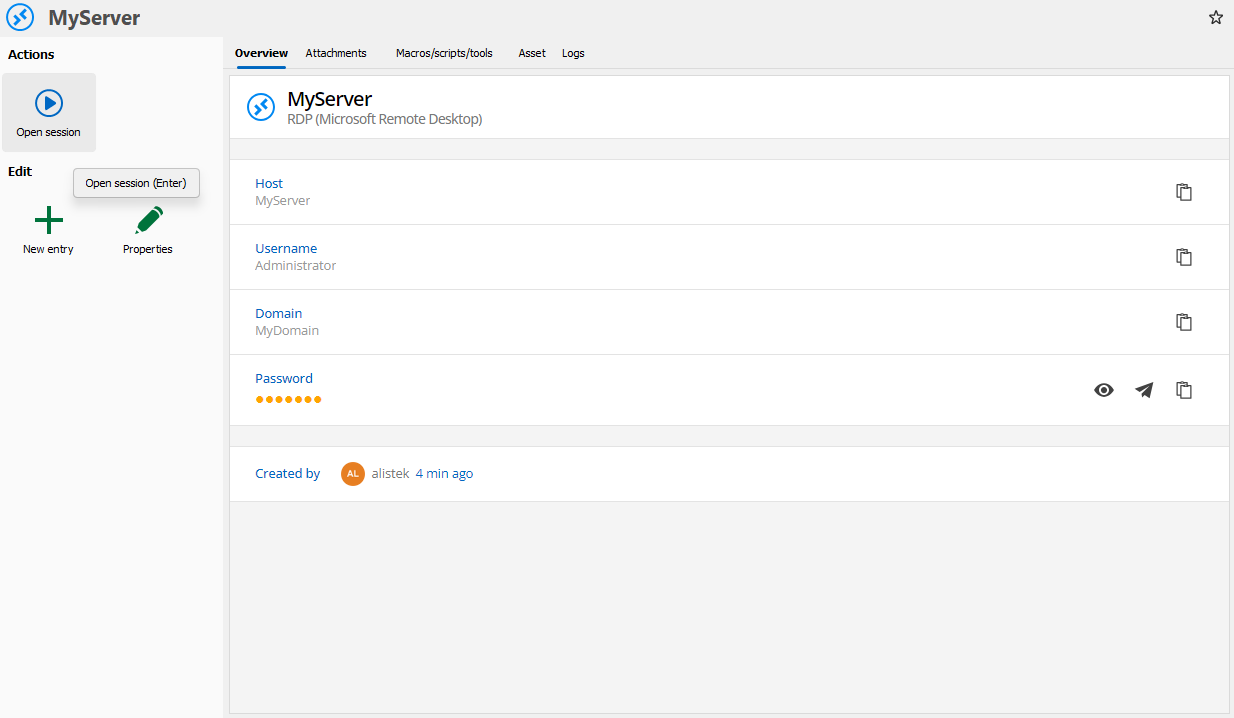
Open Sessions action to launch
3. Launch and enjoy!
Click on the newly created entry and click Open Session under Actions to launch!
Don’t re-create, import!
Save time by importing your connections from other solutions such as RDCMan, mRemote, or RDTabs.
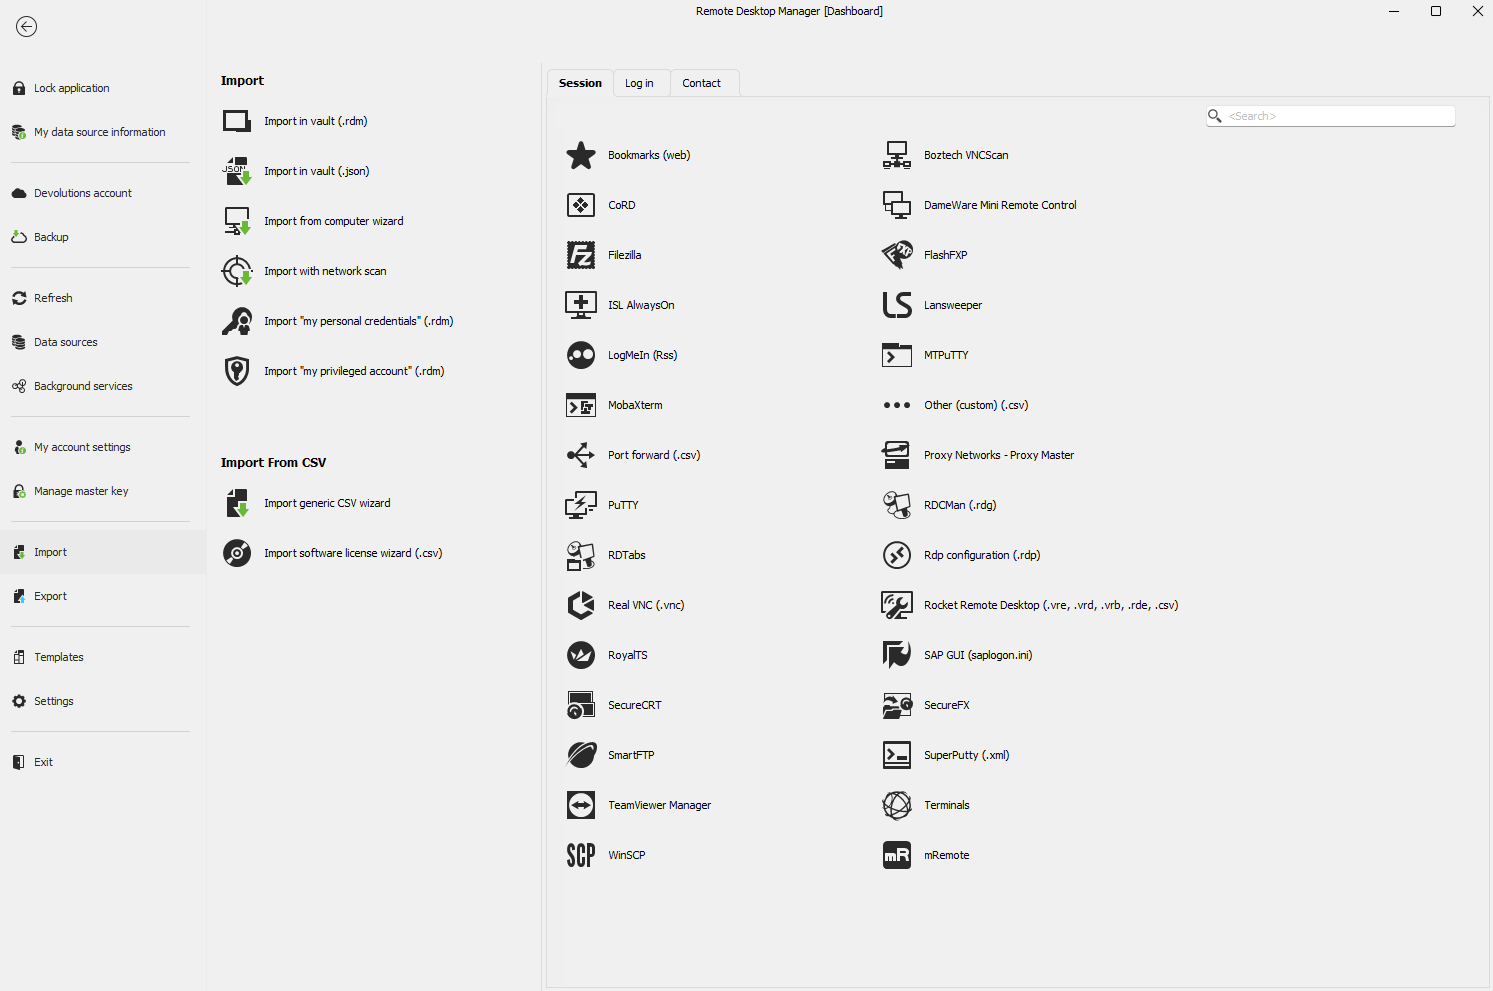
Selection of import source
1. In RDM, click File → Import and choose from one of many sources. For example, choose RDCMan (.rdg) and select your import file.
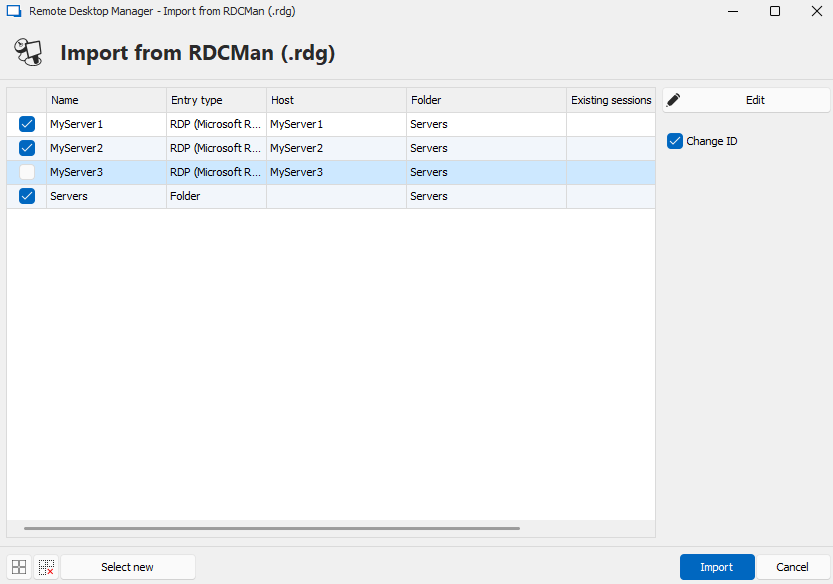
Selection of entries to import
2. Select the entries to import, and click OK.

View of an imported entry transformation
3. Immediately start using your connections without the time-consuming process of creating new ones.