
 Laurence Cadieux
Some Remote Desktop Manager Users prefer or require two accounts: a regular user account with normal permission for typical day-to-day tasks, and a “super user” account with elevated permission for privileged tasks.
In the past, the only way to permit this was by assigning each account its own license. Yes, we said “in the past,” because now in the latest version, 2023.2, we have eliminated this requirement. Now, only ONE license is needed for each linked pair. Many users have been asking for this, and as we like to say around here: your wish is our command!
Workflow
Linking two accounts to a single license is a fast, easy process. Here are the steps:
Step 1: In a Small Team or Enterprise data source, log in as an Administrator.
Step 2: From the Ribbon, go to Administration –> Management –> Users.

Step 3: Select either of the users that you wish to pair, and then click Edit User.
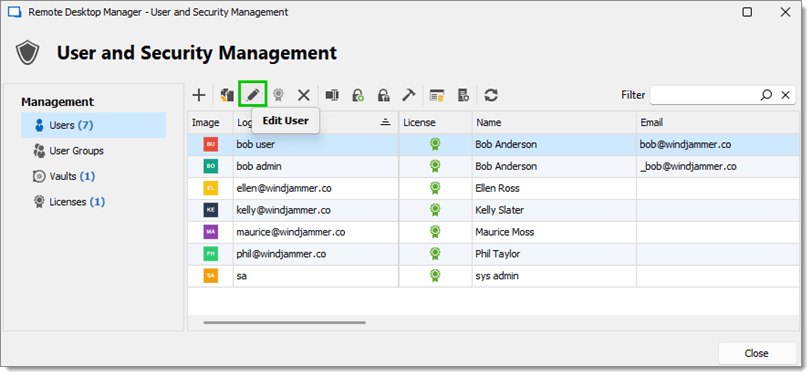
Note: There is no primary or secondary account factor, which means it does not matter which of the two accounts you choose in this step.
Step 4: Go to the Linked Account tab.
Step 5: From the dropdown menu, select the other user account that you wish to pair (i.e., the user that you did not choose in Step 3).
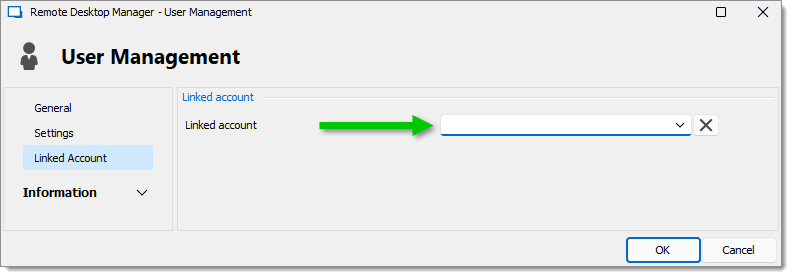
Step 6: Click OK to save the changes and close the window, then click Close.
And that’s it! The two accounts are now linked to the same license.
You can easily check which accounts are linked by going to the User and Security Management window (under the Users button), and scrolling until the Linked Account column.
Also, to switch between both linked accounts, we recommend having a corresponding data source using each credential.
Tell Us What You Think
As mentioned, this new capability is the result of feedback from our global user community. Please continue sharing your thoughts by commenting below, posting in our forum, or contacting our Support Team directly. We are always listening to you, and rely on your advice and requests to make our solutions better. And of course, if you have any questions (about this or any other feature/function), then we are here to help!
 Coralie Lemasson